Now that The Dripstone Caverns is giving out loot rewards, it’s time to make use of the tokens the user receives. NFTs have been used in crafting recipes for almost as long as WAX has been around. Neftyblocks was the first big marketplace to implement an easy self-serve tool to do this, calling the system “blends.” The idea is you basically trade one or more of the required tokens to get a new one. Sometimes you’d trade a number of common rarity tokens to get a more rare version, for example.
NFTHive.io now has their own self-serve tool, which they’re calling “crafting” – it does the same thing as Neftyblocks, but they give some rewards for using it, so I’m going to give them a try. Today I’m going to be making the first defensive, item: a fur helmet.

Getting Started / Log In
First I’m going to navigate to NFTHive.io and log in. Open the menu in the top left portion of the screen and scroll down and click “creator”
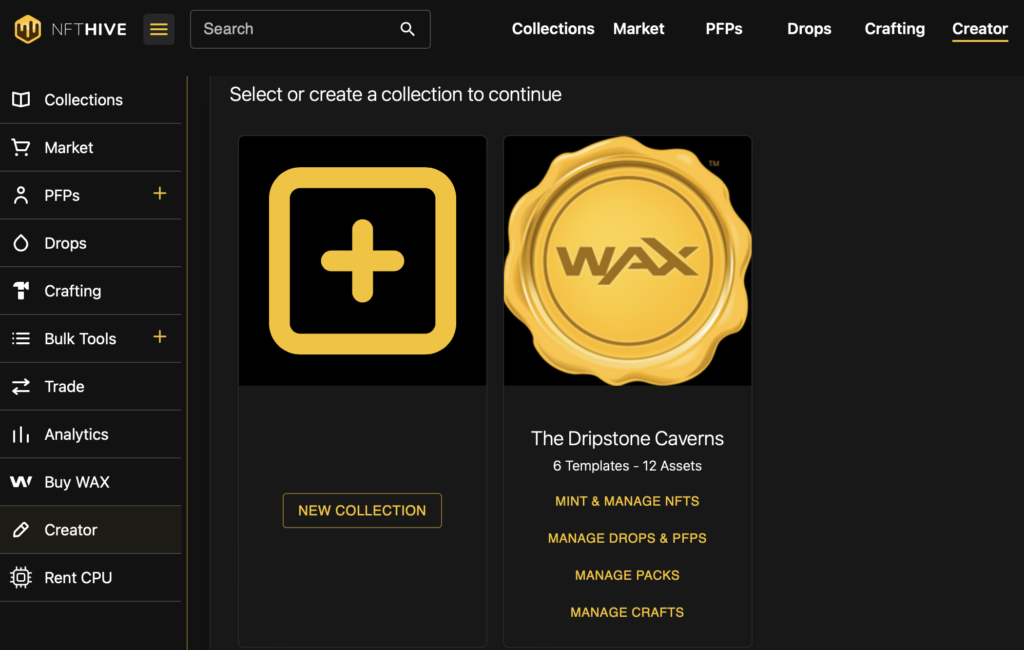
You can see some pretty self-explanatory options. There’s a lot of things NFTHive can do for your collection, but I’m going to go ahead and click Manage Crafts.
Manage Crafts
There’s a few different crafting options here, and this is really where NFTHive is differentiating themselves from Neftyblocks.
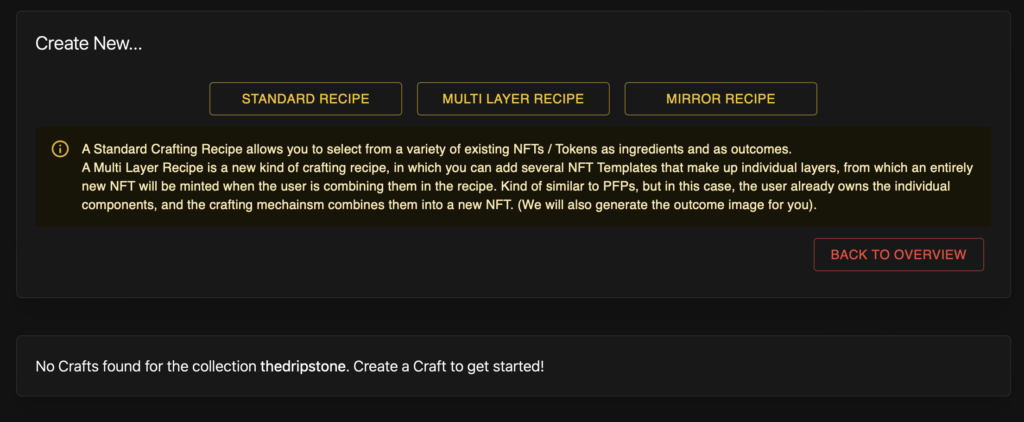
There’s currently three different types of Recipes: Standard, Multi Layer, and Mirror. This is going to be a straightforward crafting recipe. The user will trade some Rat Pelts for a Fur Helmet, so I’m going to click Standard Recipe.
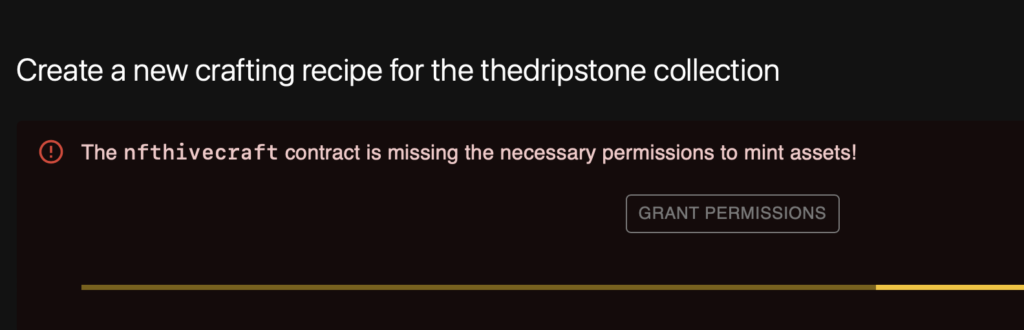
This is my first time using NFTHive as a creator, so I’m going to have to authorize it with the permissions it needs to mint assets on my behalf.
Add Information
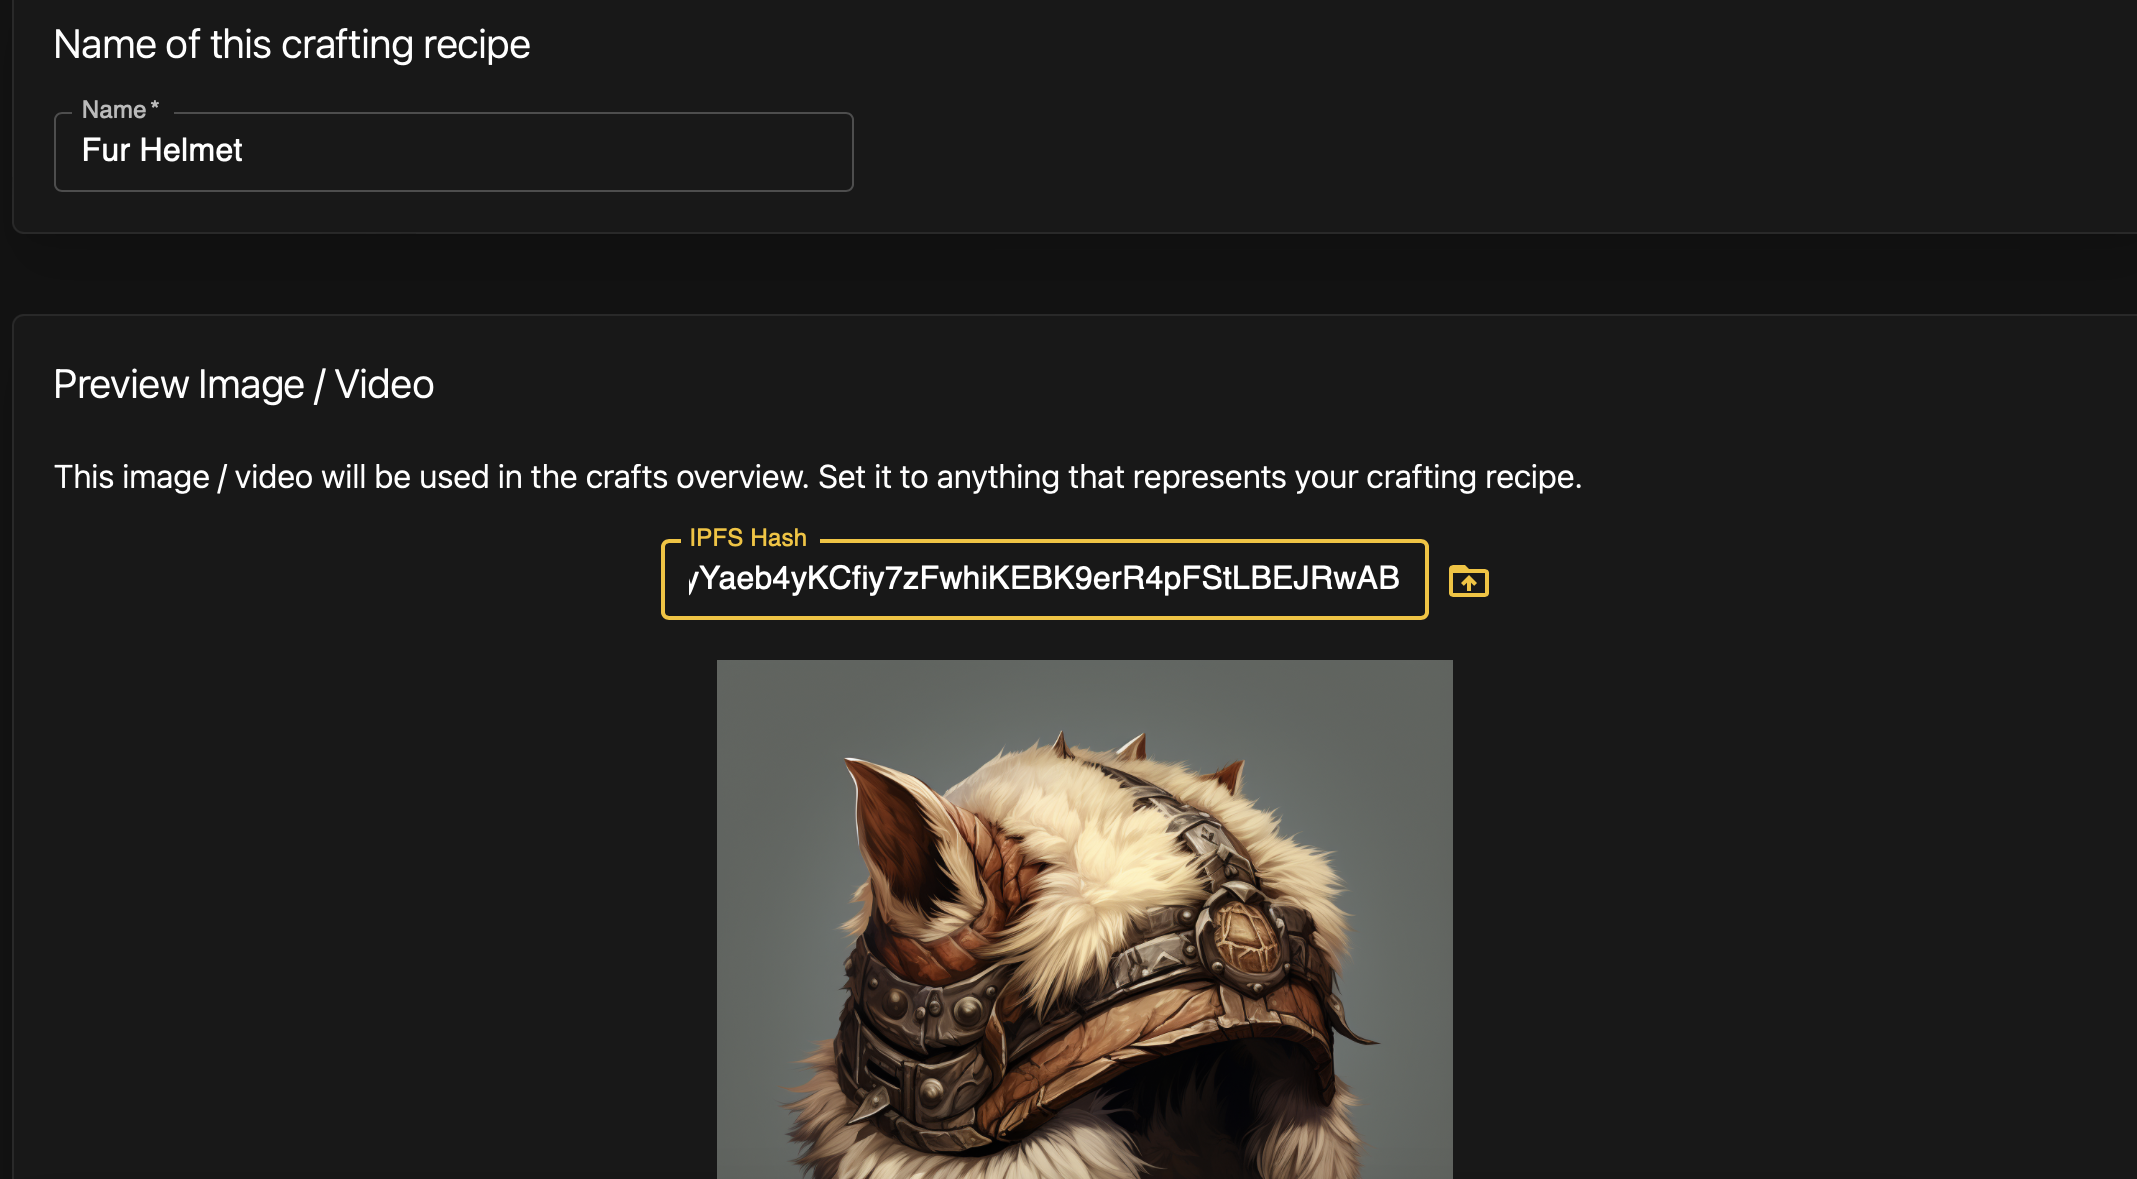
First I’m going to have to name this crafting recipe, simply Fur Helmet. Then you need to add a preview image. You can upload an image with the button to the right of IPFS Hash, or you can more easily paste the IPFS Hash from your NFT Template.
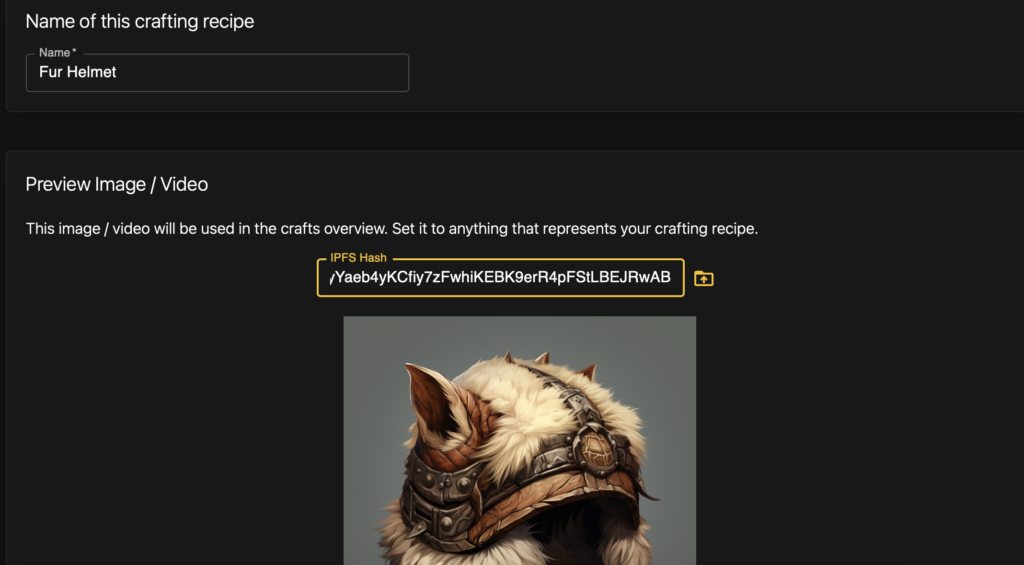
You an add a crafting video if you’d like – this will play after the user executes the craft and before they see what they get. I don’t have a video, so I’m going to skip it.
After that you should add a description for the crafting recipe so the user knows what they’re going to be doing. I added “A basic fur helmet to protect your head.”
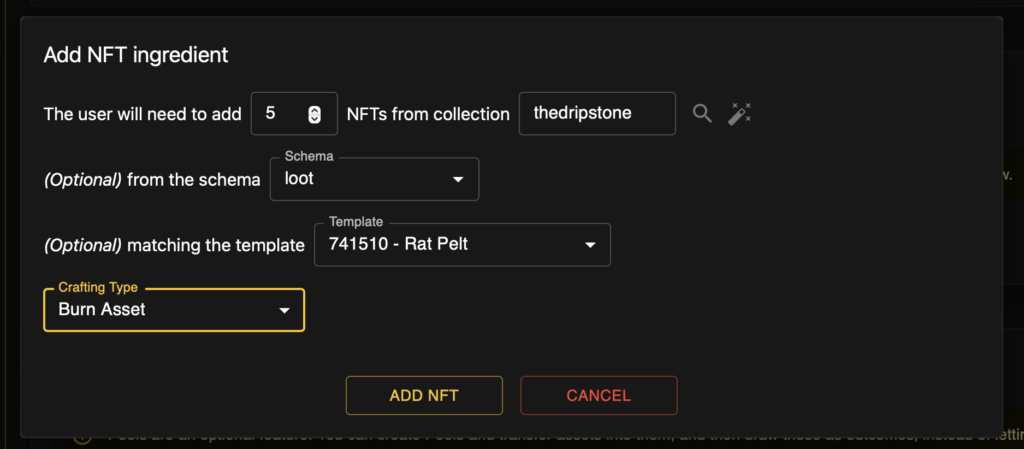
Next you need to add the ingredients. They can be either NFTs or regular Tokens. I’m going to make this recipe cost 5 Rat Pelt Tokens. The ingredients get narrowed down broadly to more specific. You can let the user use any NFT from your entire collection, any NFT from a specific schema, or finally a specific template, which I am using here. You can then select what happens to the tokens used to create the recipe and I’m going to burn them.
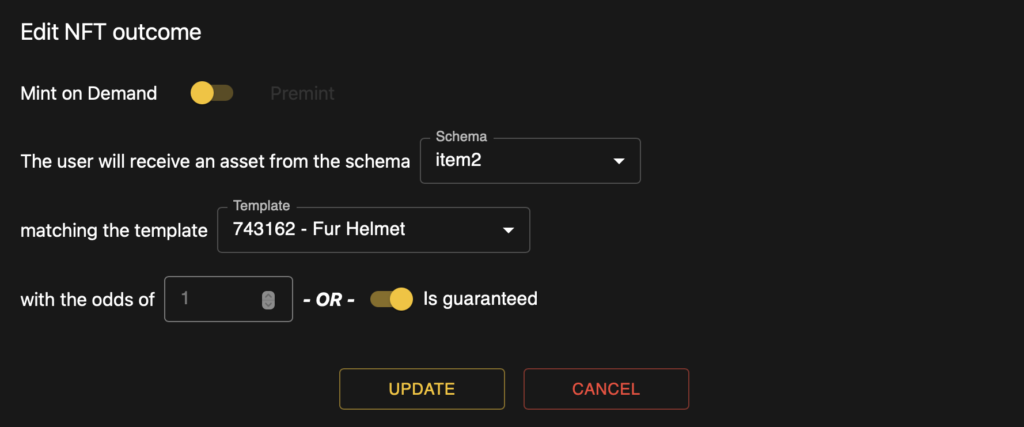
Instead of minting after crafting you can use pre-minted pools. You can transfer any NFTs to the pool and reward them with different outcomes. I’m not going to do that for this recipe so I’m going to leave that alone. The only other thing I need to set is the outcome, which will be the Fur Helmet, which will be guaranteed as a result
Once everything is all set, double check your settings, then scroll to the bottom and click Create Craft. If you don’t have enough RAM in your account, you can easily purchase some before clicking the button. Sign the transaction and your crafting recipe will be live!
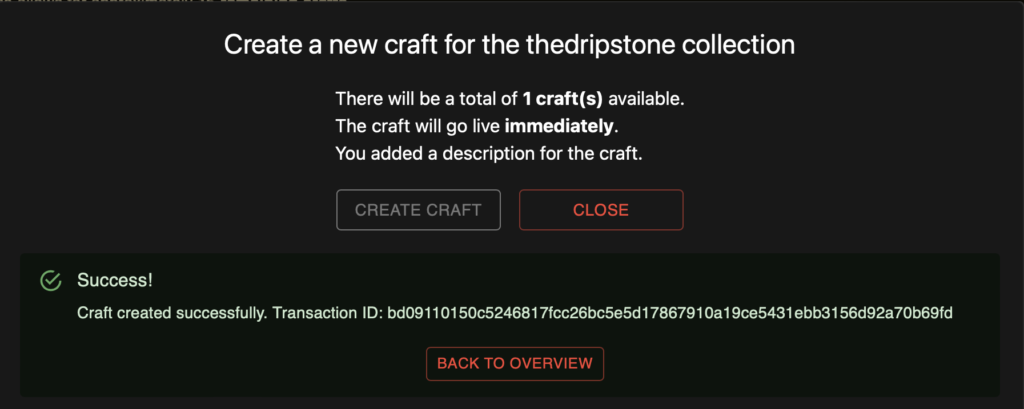
Now you can go to your collection page and click the Crafting tab and you’ll see your recipe. Happy minting!
Leave a Reply